The Beginner’s Foolproof Guide to Baking Biskvitas
Baking a delicious cake at home can be a rewarding experience, especially when you are learning to prepare a traditional sponge cake. Biskvitas, a light and airy sponge cake popular in Lithuanian baking, is an excellent choice for beginners who want to develop their baking skills. With its soft texture, delicate flavor, and versatile ingredients, this cake can be enjoyed on its own or transformed into an elegant dessert for special occasions.
Although sponge cakes may seem challenging at first, understanding a few essential techniques can make the process much easier. From choosing the right ingredients to achieving the perfect rise, this beginner-friendly guide explains how to bake biskvitas with confidence.
Understanding What Makes Biskvitas Special
Biskvitas is known for its fluffy texture and simple preparation. Unlike rich butter cakes that rely heavily on fat for their structure, many traditional sponge cake recipes depend on eggs and carefully incorporated air to create a light, tender crumb.
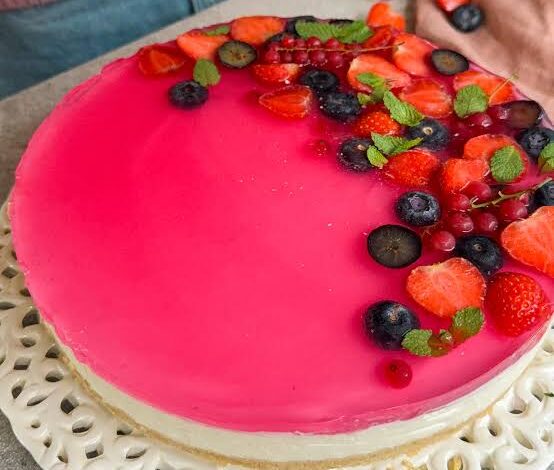
The cake’s mild sweetness makes it suitable for different flavor combinations. It can be served with fresh berries, whipped cream, fruit preserves, or a light dusting of powdered sugar. Bakers can also use it as the foundation for layered celebration cakes.
For beginners, biskvitas offers an opportunity to learn fundamental baking techniques without needing expensive equipment or complicated ingredients. The secret lies in measuring accurately, handling the batter gently, and maintaining the correct oven temperature.
Essential Ingredients for a Perfect Sponge Cake
Before starting, gather all your ingredients and measure them carefully. Preparation helps prevent mistakes and allows you to concentrate on the baking process.
Eggs
Eggs are among the most important ingredients in sponge cake. They provide structure, moisture, and the air needed for a light texture. Depending on the recipe, eggs may be separated into whites and yolks or beaten together with sugar.
Use fresh eggs at the temperature recommended by your recipe. Room-temperature eggs often whip more easily and can help produce a stable, voluminous mixture.
Sugar
Sugar adds sweetness while helping stabilize whipped eggs. It also contributes to the cake’s golden surface and tender texture. Add it gradually when whipping eggs, following the recipe’s instructions, to encourage an even mixture.
Flour
Choose plain all-purpose flour or cake flour, depending on your preferred recipe. Cake flour generally produces a more delicate crumb, while all-purpose flour can provide a slightly firmer structure.
Sifting the flour before adding it helps remove lumps and makes it easier to incorporate without losing too much air.
Optional Flavorings
Vanilla extract, lemon zest, or a small amount of citrus juice can add a pleasant aroma. Keep additional ingredients balanced so they do not interfere with the cake’s structure.
Preparing Your Kitchen Before Baking
Good preparation makes baking biskvitas much less stressful. Start by reading the complete recipe and checking that you have everything you need.
Preheat your oven to the temperature specified in your recipe. Sponge cakes benefit from consistent heat, so avoid placing the batter into an oven that has not reached the required temperature.
Prepare your cake pan by lining the base with baking parchment. Depending on the recipe, the sides may be left ungreased or lightly prepared. Some sponge cakes rely on the batter gripping the pan’s sides as it rises, so follow the instructions for your particular method.
Measure your ingredients, prepare a clean mixing bowl, and have a spatula ready. If you are whipping egg whites separately, make sure the bowl and beaters are free from grease because even small amounts of fat can prevent the whites from reaching their full volume.
Step-by-Step Instructions for Baking Biskvitas
Step 1: Whip the Eggs and Sugar
Begin by placing the eggs and sugar in a clean mixing bowl if your chosen recipe uses the whole-egg method. Beat them with an electric mixer until the mixture becomes pale, thick, and noticeably increased in volume.
This stage is essential because the trapped air helps the cake rise. Depending on the mixer and recipe, it may take several minutes to achieve the correct consistency.
If your recipe requires separating the eggs, whip the whites and yolks as directed, paying particular attention to the stability of the egg whites.
Step 2: Incorporate the Flour Gently
Sift the flour into the whipped egg mixture in small additions. Use a spatula to fold it in gently, moving from the bottom of the bowl toward the top.
Avoid vigorous stirring or beating at this stage. Excessive mixing can release the air that you worked hard to incorporate, resulting in a dense cake.
Continue folding only until no obvious pockets of dry flour remain. A few careful movements are better than prolonged mixing.
Step 3: Transfer the Batter to the Pan
Pour the finished batter into your prepared cake pan. Spread it evenly with a spatula if necessary, but avoid pressing down or knocking out the air.
Gently leveling the surface encourages more even baking. If the batter contains large air pockets, a very light tap may help, but excessive tapping can reduce its volume.
Step 4: Bake at the Correct Temperature
Place the pan in the preheated oven and bake according to your recipe. Avoid opening the oven door too early because sudden temperature changes can cause a developing sponge cake to collapse.
The baking time depends on the pan size, batter depth, oven performance, and recipe. Begin checking near the end of the suggested baking period rather than relying on a fixed time alone.
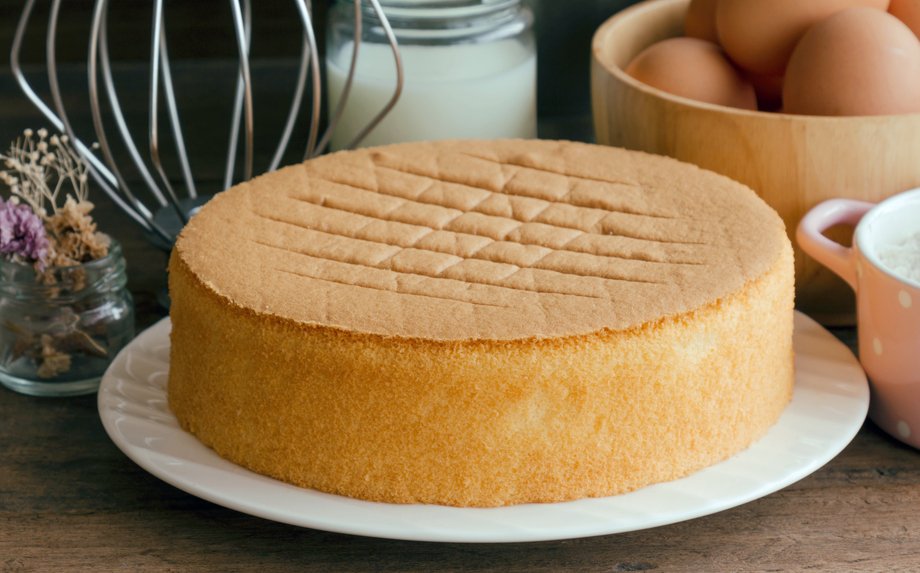
The cake is generally ready when the surface is lightly golden, the center springs back when gently touched, and a toothpick inserted into the middle comes out clean or with a few dry crumbs.
Step 5: Cool the Cake Properly
Remove the cake from the oven when it is fully baked. Follow your recipe’s cooling instructions, as some sponge cakes benefit from brief cooling in the pan while others require a different method to preserve their structure.
Once appropriate, transfer the cake to a wire rack and allow it to cool completely before slicing or decorating. Cutting it while warm can compress the crumb and make the slices uneven.
Common Mistakes Beginners Should Avoid
Even a straightforward sponge cake can present challenges, but most problems have practical solutions.
One common mistake is overmixing the batter after adding flour. This can remove air and develop too much gluten, creating a tougher texture. Folding gently helps preserve the cake’s lightness.
Another issue is inaccurate measuring. Too much flour can make the cake dry and heavy, while incorrect proportions of eggs and sugar may affect its stability. Use a kitchen scale when possible for consistent results.
Opening the oven door too early is another frequent problem. The cake may collapse before its structure has set. Keep the oven closed during the early stages of baking and check the cake near the recommended finishing time.
Finally, avoid underbaking. A sponge that looks golden on top may still be wet in the center. Always check the middle before removing the pan from the oven.
Creative Ways to Serve Biskvitas
One of the best qualities of biskvitas is its versatility. Once you have mastered the basic recipe, you can adapt the cake to suit different tastes and occasions.
For a simple afternoon treat, serve slices with tea or coffee and a little powdered sugar. Fresh strawberries, raspberries, or blueberries add color and natural sweetness.
For a more indulgent dessert, layer the sponge with whipped cream and fruit preserves. Allowing the assembled cake to rest in the refrigerator can help the layers settle and make slicing easier.
You can also brush the cooled sponge lightly with a suitable fruit syrup to add moisture. Chocolate shavings, toasted nuts, or citrus zest provide additional flavor and texture.
When experimenting, introduce new ingredients gradually. Keeping the basic sponge recipe balanced will help ensure that creative additions do not compromise its structure.
Storing Your Homemade Sponge Cake
Proper storage helps preserve the texture and flavor of freshly baked biskvitas. Once the cake has cooled completely, place it in an airtight container to prevent it from drying out.
An undecorated sponge can generally be kept at room temperature for a short period, provided the environment is cool and the recipe’s ingredients allow it. Cakes containing whipped cream, custard, or other perishable fillings should be refrigerated promptly.
If you want to prepare the cake ahead of time, wrap the completely cooled sponge securely and freeze it. Thaw it while wrapped to help retain moisture before adding decorations or fillings.
Conclusion
Baking biskvitas is an enjoyable way for beginners to explore the art of traditional sponge cakes. By choosing quality ingredients, whipping eggs properly, folding flour carefully, and baking at a consistent temperature, you can create a light and tender cake at home.
Remember that successful baking comes from patience and practice. Your first attempt may not be perfect, but each batch will teach you more about batter consistency, oven behavior, and the techniques that produce a beautiful rise.
Start with a reliable recipe, follow each step carefully, and avoid rushing the process. Once you become comfortable with the basics, experiment with fruit, cream, and different flavorings to make biskvitas your own. With a little attention to detail, this simple sponge cake can become a dependable favorite for everyday treats and memorable celebrations.